Teaching world history in a single year provides me with some exceptional challenges. We cover so much content in such a short time that I really have to remain on track and make tough decisions about what we can and can’t cover. If you are teaching your own kids, I strongly recommend a four-year cycle for world history, as that will give you time to explore topics in much more depth.
Since I don’t have that luxury, I aim to create rich, meaningful experiences my students will remember. Skimming across the surface of these events in a textbook just doesn’t work, so we use lots of hands-on activities and project-based learning.
To keep track of all the content we are zinging through, the students construct a timeline and maintain it throughout the year, adding new people and events every couple of weeks. You can have kids do this online through a variety of formats, but I find it sinks in a little better when they have a physical project they can work with. Because this is a year-long project, each time they get it out to add new events, they look back at previous sections as well, which aids in long-term retention of the material.
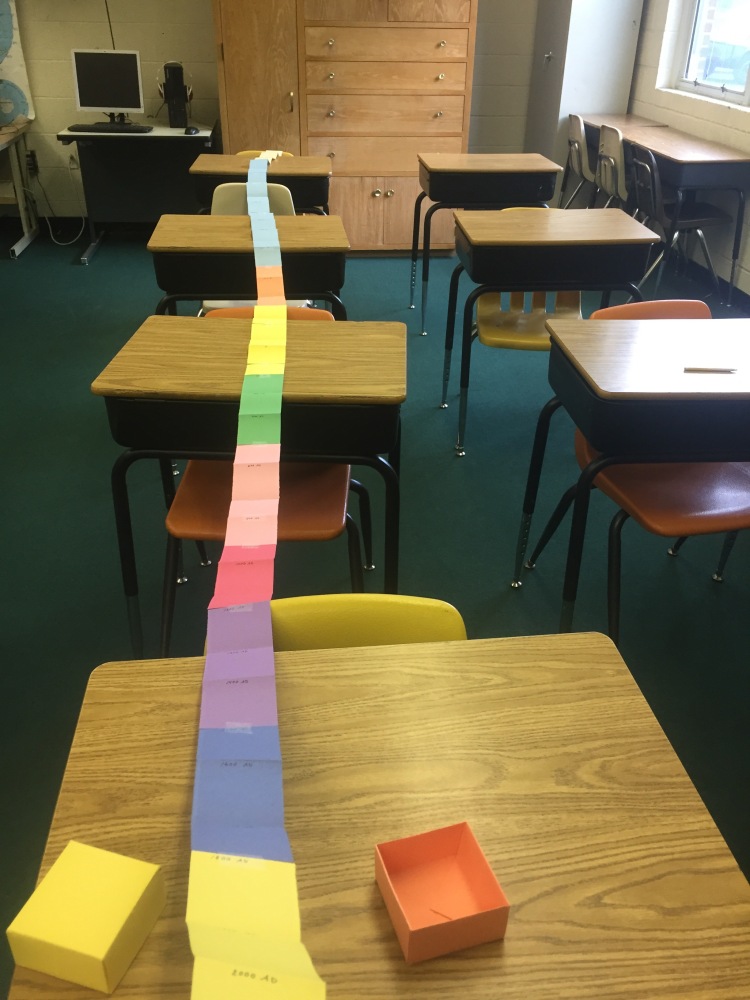
To construct our timelines, we start by making a small paper box for a container. Then we make the timeline itself by taping together strips of paper. We have found that if we split a regular piece of construction paper into four strips along the short side (or “hamburger style” as the kids call it), we can fold each strip into thirds, and they fit perfectly into our box. We plan our timeline so that each square represents one century (three centuries per paper strip), and we make enough to go from 4000 BC to 2000 AD. Note that since each square contains a century, our last square begins at 2000 AD but includes all the years up to 2099, so the kids can put events from their own lifetime there as well.
We also color-code our timelines by era, as you can see below. Six thousand years of history stretches out pretty impressively across the room, but it all folds neatly into the box.

As students add events to their timelines, I give them autonomy in what they choose to include. They recall material from the class much more easily if they have to first decide what people and events are important, rather than copying a prescribed list. I require only that they include some information from every chapter that we cover, and that they integrate both text and images into their timelines. Some students may write about how the Sumerians developed the first system of levees and dams to control flooding. Others may choose to draw Gilgamesh slaying Humbaba. It’s really up to them, and personality comes into play in a big way here. As long as each kid is taking away something they found interesting or important, we haven’t wasted our time.
What creative ways have you documented student learning? If you document mainly for your own record-keeping, how can you adjust your system to also help your students with retention?


That is a crazy cool idea! It will be so fun to see it all done at the end of the year, I’m sure!
It is! The kids put so much effort into them!
What an interesting idea. I love that is gets kids to appreciate their progress and have a tangible way to look back on what they learned!
This is so cool and a great way to learn history in a creative way!
So cool! I wish I had teachers that put as much thought into their curriculum as you do!
I like that you add some artistic aspect to history! So great!